(HDB, Condo, Landed)
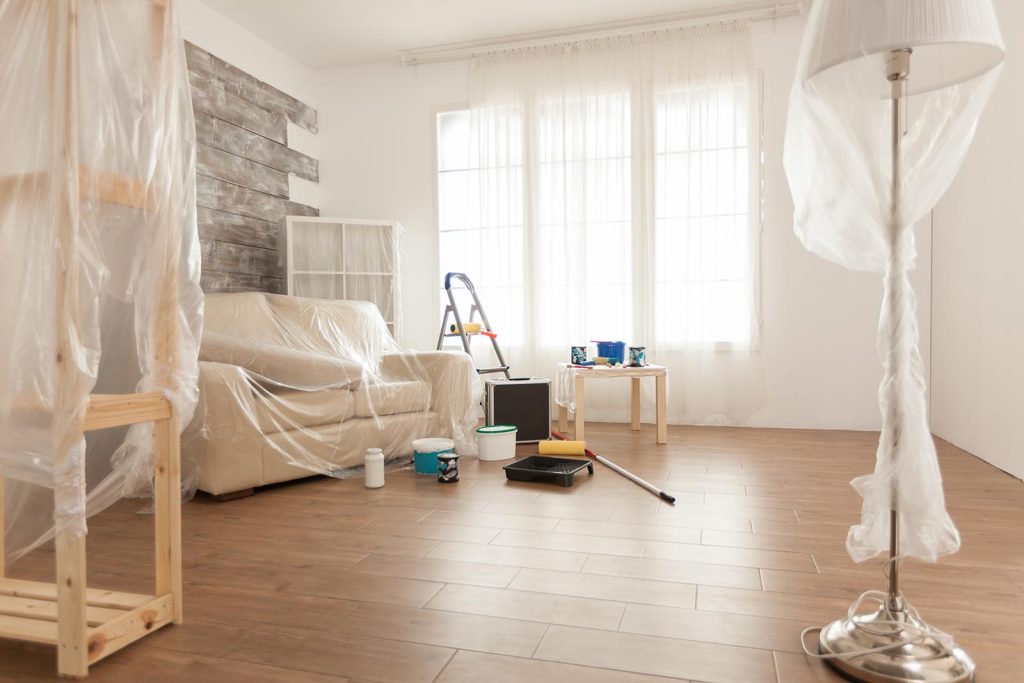
Renovation is exciting – until you see fine dust on every surface. A proper post-renovation cleaning checklist
helps you remove renovation dust safely, protect your new finishes, and move in with confidence.
Key Takeaways
- Post-reno dust spreads through vents, drawers, and high shelves – clean top to bottom, dry to wet.
- Use the right tools (microfibre, HEPA vacuum, mild cleaners) to avoid scratching new surfaces.
- If you are short on time or dealing with heavy debris, professional post-renovation cleaning is worth it.
Renovation Dust Hides Everywhere
Renovation dust is not just on the floor. It settles on walls, inside cabinets, on window tracks, and even
around aircon vents. The good news: once you follow the right order, it becomes manageable.
Before You Start: Quick Prep
- Open windows for ventilation (if it is safe to do so).
- Remove leftover materials (cardboard, plastic sheets, tape, small debris).
- Wear a mask and gloves while handling dust and chemicals.
- Take photos of any damage you spot before cleaning (useful for warranty or contractor follow-up).
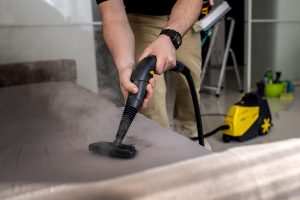
What You Need for Post-Renovation Cleaning
- Microfibre cloths (more than you think)
- HEPA vacuum (or a vacuum with a good filter)
- Soft brush / small detailing brush (for corners and tracks)
- Mild all-purpose cleaner (pH-neutral is safest for many finishes)
- Degreaser (for kitchen areas and adhesive residue)
- Glass cleaner
- Mop and bucket (two-bucket method helps)
- Step stool (for high shelves and ceiling fans)
The Best Post-Reno Cleaning Order (Top to Bottom)
Cleaning in the right order prevents you from re-dusting areas you already cleaned.
- Step 1: Ceilings, cornices, light fixtures, ceiling fans
- Step 2: High shelves, cabinet tops, aircon vents (external)
- Step 3: Walls, doors, door frames, switches
- Step 4: Windows, grilles, tracks, ledges
- Step 5: Built-in carpentry (inside and outside)
- Step 6: Bathrooms and kitchen (scrub and rinse)
- Step 7: Floors last (vacuum, then mop)
Post-Renovation Cleaning Checklist (Room by Room)
Living Room / Dining
- Dust and wipe ceiling fan, lights, and curtain rods
- Wipe walls (spot clean marks and fine dust)
- Clean switches, sockets, and skirting boards
- Vacuum and wipe window sills and tracks
- Wipe built-in shelves, TV console, and drawers (inside and outside)
Kitchen
- Wipe cabinet exterior and handles (dust first, then degrease)
- Clean countertop and backsplash
- Wipe inside cabinets and drawers before putting items in
- Clean sink and tap (check for renovation grit)
- Degrease hood exterior and wipe surrounding areas
- Clean appliance exterior (fridge, oven, microwave – if installed)
Bathrooms
- Rinse and scrub tiles, grout lines, and corners
- Clean toilet bowl, seat, and base
- Wipe mirrors, glass panels, and shower screens
- Clean floor trap area (common dust collection point)
- Wipe vanity drawers and shelves
Bedrooms
- Dust and wipe wardrobes and drawers inside and out
- Clean window tracks and ledges
- Wipe doors, handles, and switches
- Vacuum the entire room, especially corners
Balcony / Service Yard
- Sweep and vacuum corners (cement dust gathers here)
- Clean floor and wall edges
- Wipe railing and window grilles
- Check the service yard for debris near drains
10 Hidden Dust Hotspots People Forget
- Inside drawers and cabinet corners
- Top of wardrobes and tall shelves
- Window tracks and rubber seals
- Behind doors and door hinges
- Skirting board edges and gaps
- Aircon vent covers (external) and nearby walls
- Bathroom exhaust fan cover
- Floor trap grates
- Light switch edges and socket plates
- Balcony railing grooves
DIY vs Professional Post-Renovation Cleaning
DIY can work if:
- Your renovation was light (painting, minor carpentry)
- You have time for a detailed clean (often a full day or more)
- You have the right tools (especially a good vacuum)
Consider professional post-renovation cleaning if:
- There is heavy dust across multiple rooms
- You see grout haze, paint splatter, or adhesive residue
- You need the home ready for move-in quickly
- You want trained cleaners who follow a checklist and bring professional equipment
Why Choose IMClean for Post-Renovation Cleaning
IMClean helps homeowners get a proper post-renovation clean without the stress.
- Licensed and insured cleaning team
- WSQ-trained, in-house professionals (no outsourcing)
- Detailed checklists for consistent results
- Flexible scheduling to fit your move-in timeline
Learn more about our Home Cleaning Services in Singapore:
https://imclean.com.sg/our-services/home-cleaning-singapore/
Ready to Move In?
IMClean makes it easy to start fresh in a clean, comfortable home.
Book A Service: https://imclean.com.sg/contact-us/
Frequently Asked Questions
1. How soon after renovation should I do post-renovation cleaning?
Clean after all works are completed, before you move furniture and personal items in.
2. What is the best order to clean after renovation?
3. Do I need to clean inside cabinets and drawers after renovation?
4. Does IMClean bring equipment and supplies for post-reno cleaning?
Our comprehensive cleaning includes professional equipment and cleaning supplies trusted for post-renovation cleaning. With a minimum of 2 cleaners per unit, between 4 to 10 hours of cleaning depending on size of unit, you can trust IMCLEAN to provide a cleaning service ready for you to move in.
5. How do I book post-renovation cleaning with IMClean?
Request a quotation and book via https://imclean.com.sg/contact-us/.